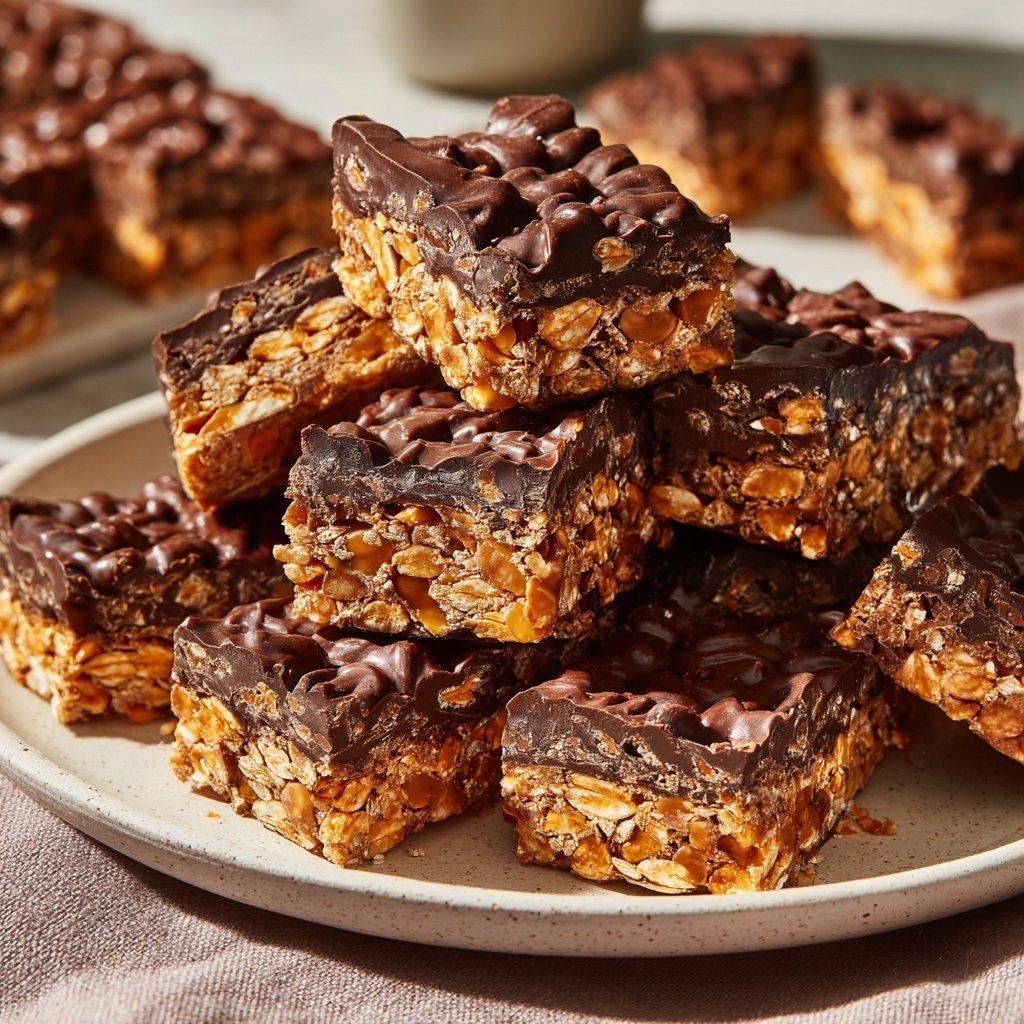
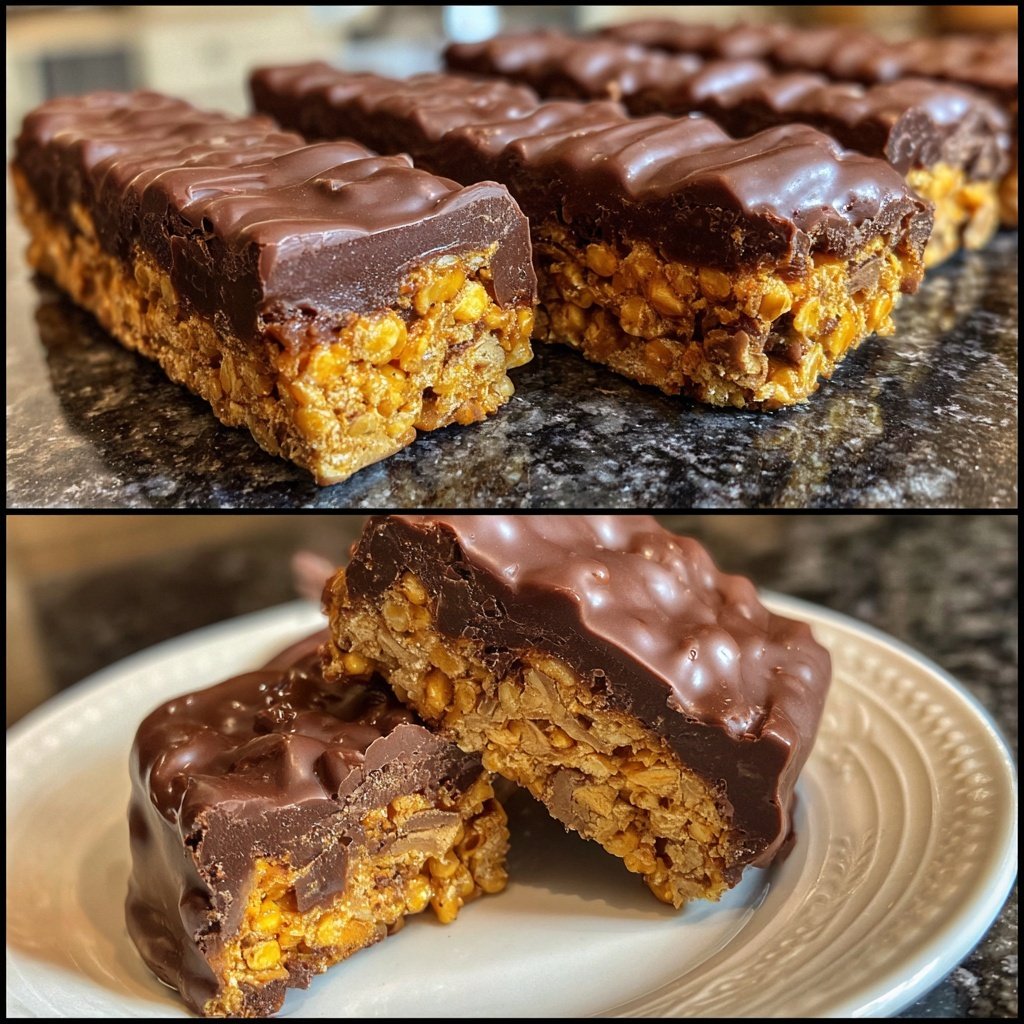
Chocolate Honeycomb Bars
Highlighted under: Baked Indulgences
Whenever I crave a sweet treat, Chocolate Honeycomb Bars come to my mind. The combination of crunchy honeycomb and rich chocolate always brings a smile to my face. I love how easy they are to make; simply melt the chocolate, mix in the honeycomb, and let it set. It’s a delightful balance of textures and flavors that make these bars an instant favorite in my household. Plus, they're perfect for sharing at gatherings or as a special dessert for myself!
I've experimented with various sweets over the years, but these Chocolate Honeycomb Bars always stand out. The magic happens when the sweet honeycomb is coated in rich chocolate, creating a satisfying crunch in every bite. I remember the first time I made them for friends; they were gone within minutes! I learned that tempering the chocolate is key to ensuring a perfect sheen and snap.
One tip I discovered is to chop the honeycomb pieces evenly so every bar has that perfect crunch-to-chocolate ratio. Trust me, you want to savor every moment of this delicious treat. The simplicity of preparation makes it an ideal recipe for novice cooks, too. You can never go wrong with a classic like this!
Why You'll Love These Bars
- Crunchy texture that satisfies every craving
- Decadent chocolate flavor that indulgent lovers adore
- Easy to make and perfect for special occasions or everyday treats
Achieving the Perfect Melt
Melted chocolate can make or break your Chocolate Honeycomb Bars, so it's essential to use a gentle heat method. The double boiler technique, particularly, is perfect for this recipe, as it prevents the chocolate from scorching. When the chocolate is glossy and smooth, it's ready. I prefer using a spatula to stir, as it helps scrape down the sides of the bowl and ensures even melting. If you notice any chocolate chunks remaining after stirring, place the bowl back over the simmering water for a few more moments—just don’t let water get into the chocolate.
If you're looking to adjust the chocolate's flavor profile, you might consider replacing some of the dark chocolate with milk or white chocolate. However, keep in mind that this may alter the sweetness and the overall texture of the bars. Combining different types of chocolate can also yield a unique depth of flavor, making it a fun experiment to find your perfect blend.
Honeycomb Harmony
The honeycomb adds not just flavor but texture too. When mixing it into the melted chocolate, ensure that each piece is thoroughly coated to balance the crunch with the smoothness of the chocolate. This step is crucial as it helps the honeycomb to hold its shape during the setting process. If you find large chunks of honeycomb, consider chopping them into smaller pieces to ensure every bite has an enjoyable crunch.
If you're unable to find store-bought honeycomb, you can make your own at home using sugar, baking soda, and syrup. However, due to the delicate nature of homemade honeycomb, it’s essential to monitor the temperature carefully when cooking the sugar to avoid burning. Let it cool completely before breaking it into pieces, which will ensure it's still crunchy.
Storing and Serving Suggestions
Storing your Chocolate Honeycomb Bars properly will help maintain their texture. Once cut, place the bars in an airtight container lined with parchment paper to prevent them from sticking together. They can be stored at room temperature for up to a week, or you can refrigerate them for an extended freshness of up to two weeks. Just be cautious of condensation if bringing them back to room temperature.
If you want to enhance your serving experience, consider drizzling a little extra melted chocolate over the top before chilling them. This not only adds a visual appeal but also a richer chocolate flavor with every bite. You can additionally sprinkle sea salt on top just before the chocolate sets for a delightful contrast. These little touches can make your dessert stand out at gatherings!
Ingredients
For the Bars
- 200g of dark chocolate, chopped
- 100g of honeycomb, broken into pieces
- 50g of unsalted butter
Instructions
Steps
Melt the Chocolate
In a heatproof bowl, combine the chopped dark chocolate and unsalted butter. Place over a saucepan of gently simmering water, creating a double boiler. Stir occasionally until melted and smooth.
Mix in the Honeycomb
Remove the bowl from heat and let it cool slightly. Stir in the broken honeycomb pieces until they are thoroughly coated with chocolate.
Set the Mixture
Line a square baking dish with parchment paper. Pour the chocolate and honeycomb mixture into the dish, spreading it evenly. Refrigerate for about 15 minutes or until set.
Cut into Bars
Once set, remove from the fridge and lift out using the parchment paper. Cut into bars of your desired size and enjoy!
Enjoy Your Treat!
Pro Tips
- For an extra touch, feel free to sprinkle sea salt on top before refrigerating for a salty-sweet combination.
Troubleshooting Common Issues
If you find that your chocolate has seized during the melting process, it may be due to moisture contact. To salvage it, add a teaspoon of vegetable oil or coconut oil once you've removed it from the heat—this can help loosen the chocolate back to a usable consistency. Be sure to avoid any water during your next melting attempt.
Sometimes, the mixture may not set properly due to insufficient refrigeration. Ensure your refrigerator is at the right temperature, ideally around 0°C to 4°C (32°F to 39°F), and give the Chocolate Honeycomb Bars a full 15 to 20 minutes in the fridge for optimal structure before cutting.
Scaling the Recipe
If you're planning to serve a larger crowd, scaling the recipe is straightforward. Just double or triple the quantities of chocolate, honeycomb, and butter accordingly. Keep in mind that you'll need a larger baking dish, and ensure to check the setting time as it might vary slightly with volume. You can use a 9x13-inch pan for a doubled recipe for a thicker bar experience.
When scaling up, consider making a variety of flavors by adding mix-ins like nuts, dried fruits, or even additional spices. This way, you can cater to different preferences while still enjoying the same base recipe!
Questions About Recipes
→ Can I use milk chocolate instead of dark?
Yes, you can substitute milk chocolate, but the flavor will be sweeter.
→ How should I store the bars?
Keep them in an airtight container in the refrigerator to maintain freshness.
→ Can I add nuts or other toppings?
Absolutely! Chopped nuts or sprinkles can add a fun twist to these bars.
→ How long do these bars last?
They can last up to a week in the fridge, but I doubt they will last that long!
Chocolate Honeycomb Bars
What You'll Need
For the Bars
- 200g of dark chocolate, chopped
- 100g of honeycomb, broken into pieces
- 50g of unsalted butter
How-To Steps
In a heatproof bowl, combine the chopped dark chocolate and unsalted butter. Place over a saucepan of gently simmering water, creating a double boiler. Stir occasionally until melted and smooth.
Remove the bowl from heat and let it cool slightly. Stir in the broken honeycomb pieces until they are thoroughly coated with chocolate.
Line a square baking dish with parchment paper. Pour the chocolate and honeycomb mixture into the dish, spreading it evenly. Refrigerate for about 15 minutes or until set.
Once set, remove from the fridge and lift out using the parchment paper. Cut into bars of your desired size and enjoy!
Extra Tips
- For an extra touch, feel free to sprinkle sea salt on top before refrigerating for a salty-sweet combination.
Nutritional Breakdown (Per Serving)
- Calories: 250 kcal
- Total Fat: 18g
- Saturated Fat: 10g
- Cholesterol: 30mg
- Sodium: 50mg
- Total Carbohydrates: 23g
- Dietary Fiber: 1g
- Sugars: 20g
- Protein: 3g