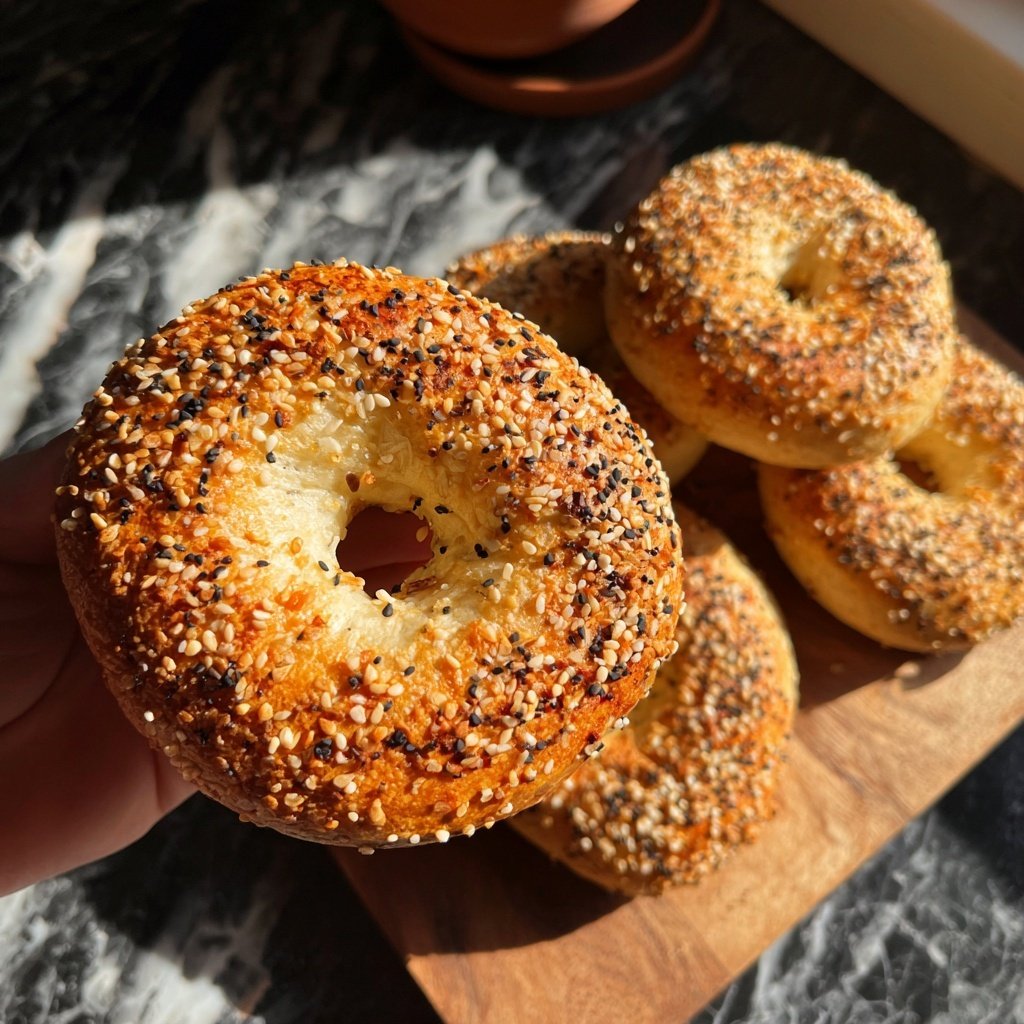
Yogurt Bagels With Self Rising Flour
Highlighted under: Simple & Speedy
I absolutely love making yogurt bagels with self-rising flour! This recipe has become a weekend tradition in my kitchen. The dough is simple and requires hardly any ingredients, making it perfect for those last-minute bagel cravings. With just yogurt and flour, you create a deliciously chewy bagel in no time. I always enjoy experimenting with different toppings to customize each batch, keeping things exciting and flavorful. Trust me, this is an easy and satisfying way to enjoy homemade bagels!
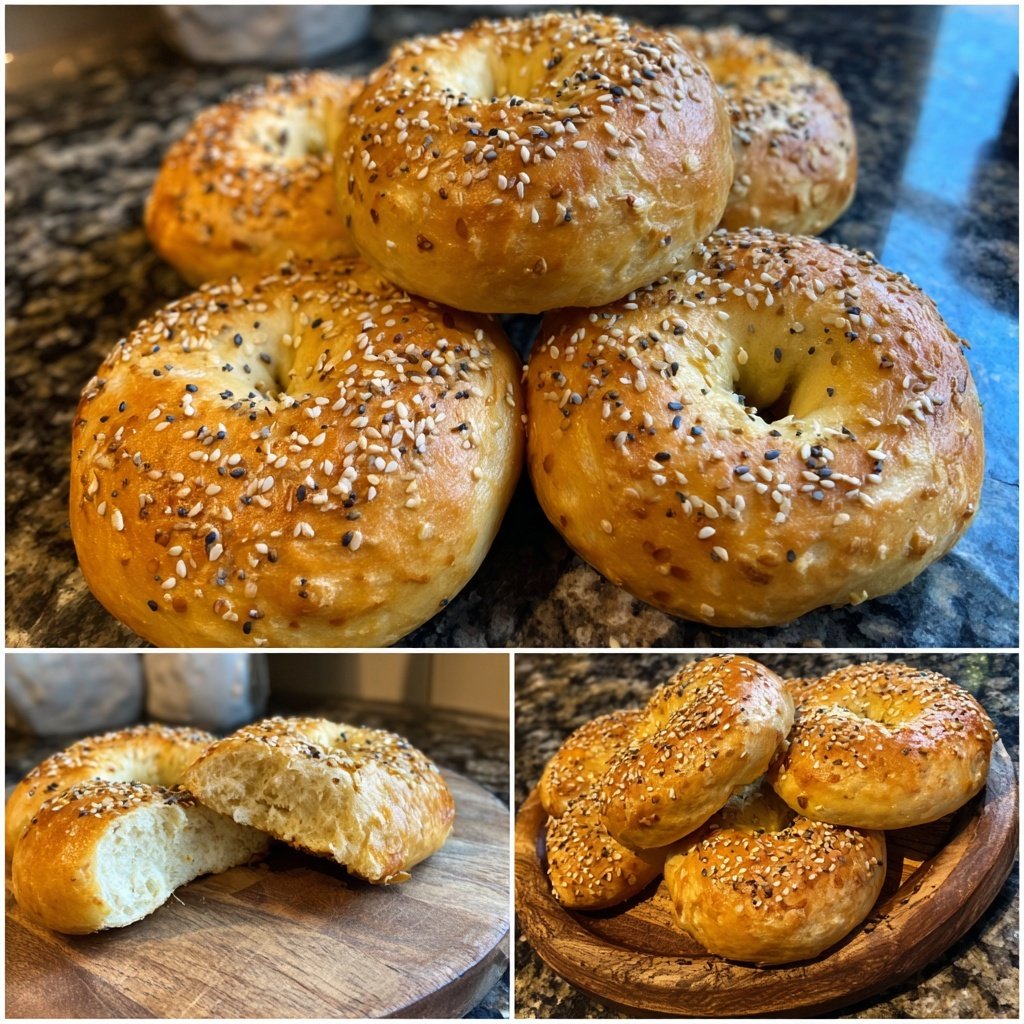
When I first tried making yogurt bagels, I was surprised at how simple yet satisfying the process was. Using self-rising flour cuts down on prep time, and the bagels turn out wonderfully fluffy! I also found that boiling the bagels briefly before baking gives them that classic chewiness and shiny crust that we all love.
One particular weekend, I decided to add everything bagel seasoning to the tops, and it transformed the flavor profile completely. It’s amazing how a few simple ingredients can create something so delicious. Now, I can't imagine a weekend without these perfect homemade bagels!
Why You'll Love These Bagels
- Incredibly quick and easy preparation
- Chewy texture with a beautifully crisp crust
- Versatile for sweet or savory toppings
Mastering the Dough
Using self-rising flour helps to simplify the dough-making process, eliminating the need for yeast and additional leavening agents. The combination of flour and Greek yogurt not only provides a chewy texture but also ensures the bagels are moist. When mixing, aim for a dough that’s soft yet not overly sticky; if you find it’s too wet, a tablespoon at a time is all you need to add more flour. This ensures your bagels have the right consistency for shaping.
Kneading the dough for just a minute is essential. Over-kneading can result in tough bagels due to gluten development, while under-kneading may prevent the dough from holding its shape during boiling and baking. After kneading, if the dough feels overly sticky, incorporate a bit more flour until it’s manageable. This quick and gentle approach is all you need to achieve that perfect bagel structure.
Boiling for Bagel Perfection
Boiling the shaped bagels is a crucial step that contributes to their dense, chewy texture. Make sure your pot of water is at a rolling boil before adding the bagels, which ensures they cook evenly. Boil each bagel for about one minute on each side; a longer boil can result in an undesirable rubbery texture. After boiling, place them on a wire rack briefly to drain excess water, allowing for an optimal crust once baked.
If you want to experiment with variations, consider adding a bit of honey or baking soda to the boiling water. Honey adds a subtle sweetness and shine, while baking soda enhances the crust color. Just remember that these adjustments can slightly alter the flavor profile, so use them according to your taste preferences.
Perfecting Your Bagel Bake
Baking the bagels at 375°F (190°C) for 15 minutes is generally ideal for achieving a beautiful golden-brown finish. Keep a close eye on them towards the end of the baking time; they should puff slightly and develop a crisp crust that offers a nice contrast to the chewy interior. If your bagels aren’t browning as expected, consider leaving them in for an extra minute or so, but be careful not to overdo it, as they can become dry.
Experimenting with toppings is a fantastic way to customize your bagels. While sesame and poppy seeds are classic choices, try adding herbs, spices, or even cheese for a unique twist. For an elevated flavor, brush the bagels with a bit of olive oil before adding toppings. This not only helps the toppings adhere but also enhances the overall flavor.
Ingredients
Gather these simple ingredients:
For the Bagels
- 1 cup self-rising flour
- 1 cup plain Greek yogurt
- Optional toppings (sesame seeds, poppy seeds, or everything seasoning)
Make sure to have these ingredients ready before you start!
Instructions
Follow these steps to create your bagels:
Prepare the Dough
In a mixing bowl, combine the self-rising flour and Greek yogurt. Stir until it forms a soft dough. If the mixture is too sticky, add a little more flour.
Shape the Bagels
Turn the dough onto a lightly floured surface and knead it gently for a minute. Divide the dough into four equal portions, shape each into a ball, and then poke a hole through the center to form the bagel shape.
Boil the Bagels
Bring a large pot of water to a boil. Carefully drop the shaped bagels into the boiling water, cooking for about 1 minute on each side. Remove and let them drain.
Bake
Preheat your oven to 375°F (190°C). Place the boiled bagels on a baking sheet lined with parchment paper. If desired, sprinkle with your choice of toppings. Bake for 15 minutes or until golden brown.
Let the bagels cool slightly before serving. Enjoy them fresh with your favorite spread!
Pro Tips
- Experiment with different seasonings and toppings to customize your bagels. You can also add ingredients like cheese or herbs directly into the dough for added flavor.
Make-Ahead and Storage
These yogurt bagels can be made ahead of time and stored in the refrigerator for up to two days. If you want to extend their shelf life, consider freezing the bagels. After baking, allow them to cool completely on a wire rack. Once cooled, wrap each bagel tightly in plastic wrap and place them in a resealable plastic bag. They can be frozen for up to three months, allowing you to enjoy fresh bagels whenever the craving strikes.
To reheat, simply pop the frozen bagels directly into a toaster or an oven preheated to 375°F (190°C) for about 10 minutes. This will restore their crispness and warmth, making them feel just as delightful as when they were freshly baked.
Troubleshooting Tips
If your bagels turn out too chewy or dense, there may have been an issue with kneading or boiling. Always be mindful of kneading time; under-kneading leads to a poor bagel structure, while over-kneading toughens the dough. Additionally, boiling each side for about one minute is enough for proper cooking without becoming rubbery.
On the flip side, if your bagels spread too much during baking, it may indicate that the dough was too wet. Next time, consider adjusting the yogurt quantity or incorporating more flour to achieve the right consistency. Remember, getting a feel for the dough takes practice, and each batch will help refine your technique.
Serving Suggestions
These yogurt bagels are incredibly versatile, making them perfect for breakfast, lunch, or as a snack. Serve them warm with cream cheese for a classic combo, or layer with avocado for a delicious brunch option. You can also slice them open and fill them with smoked salmon, capers, and red onions for an upscale treat.
For a sweet twist, try spreading your favorite jam or nut butter on top, along with fresh fruit. Fresh berries or banana slices complement the texture and flavor beautifully. Don’t be afraid to get creative with your toppings and fillings—the possibilities are as fun as they are delicious!
Questions About Recipes
→ Can I make these bagels gluten-free?
Yes, you can substitute self-rising flour with a gluten-free flour blend, but the texture may vary.
→ How do I store leftover bagels?
Store them in an airtight container at room temperature for up to 2 days, or you can freeze them for longer storage.
→ What if I don’t have self-rising flour?
You can make your own by combining all-purpose flour with baking powder and salt. Use 1 cup of all-purpose flour, 1.5 teaspoons of baking powder, and a pinch of salt.
→ Can I add flavors to the dough?
Absolutely! Feel free to mix in spices or cheese to the dough before shaping for a unique twist.
Yogurt Bagels With Self Rising Flour
Created by: Brittany Shaw
Recipe Type: Simple & Speedy
Skill Level: Beginner
Final Quantity: 4 bagels
What You'll Need
For the Bagels
- 1 cup self-rising flour
- 1 cup plain Greek yogurt
- Optional toppings (sesame seeds, poppy seeds, or everything seasoning)
How-To Steps
In a mixing bowl, combine the self-rising flour and Greek yogurt. Stir until it forms a soft dough. If the mixture is too sticky, add a little more flour.
Turn the dough onto a lightly floured surface and knead it gently for a minute. Divide the dough into four equal portions, shape each into a ball, and then poke a hole through the center to form the bagel shape.
Bring a large pot of water to a boil. Carefully drop the shaped bagels into the boiling water, cooking for about 1 minute on each side. Remove and let them drain.
Preheat your oven to 375°F (190°C). Place the boiled bagels on a baking sheet lined with parchment paper. If desired, sprinkle with your choice of toppings. Bake for 15 minutes or until golden brown.
Extra Tips
- Experiment with different seasonings and toppings to customize your bagels. You can also add ingredients like cheese or herbs directly into the dough for added flavor.
Nutritional Breakdown (Per Serving)
- Calories: 210 kcal
- Total Fat: 5g
- Saturated Fat: 1g
- Cholesterol: 5mg
- Sodium: 360mg
- Total Carbohydrates: 36g
- Dietary Fiber: 2g
- Sugars: 1g
- Protein: 9g