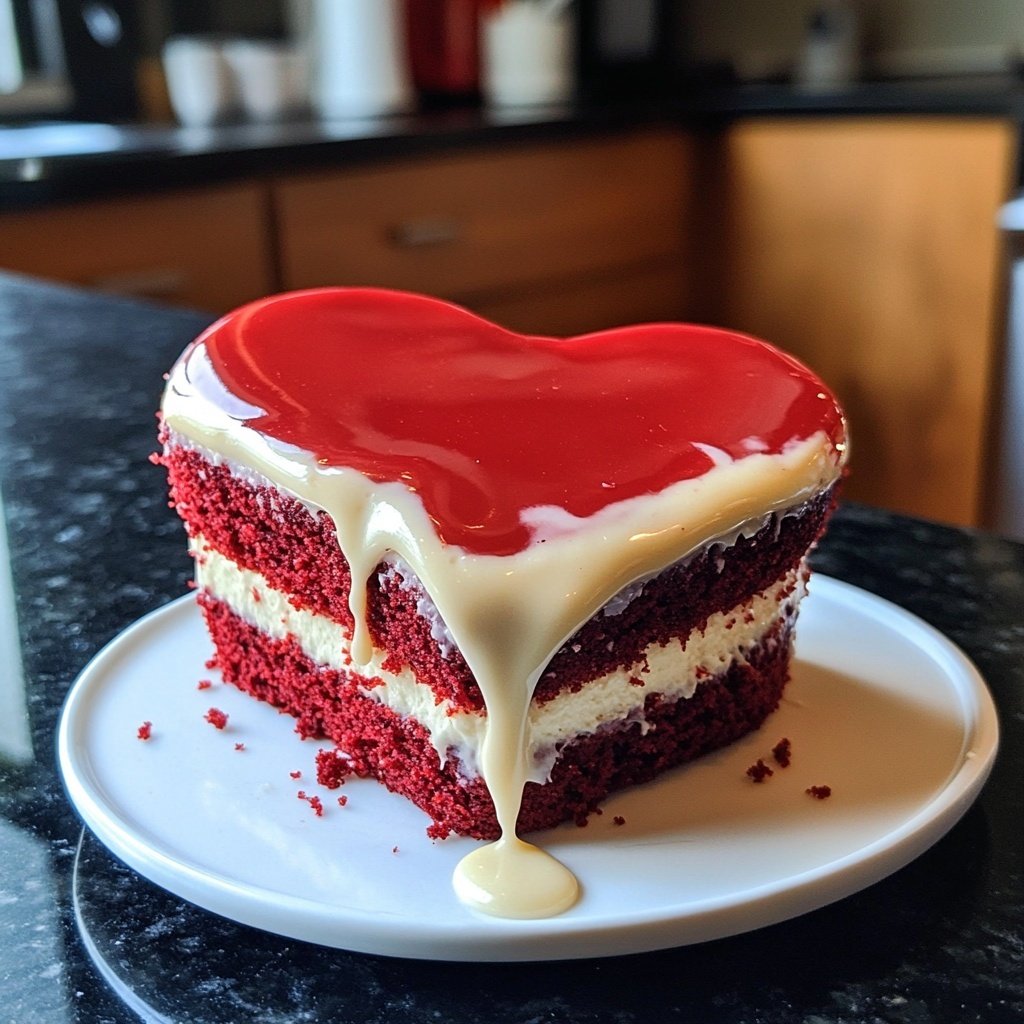
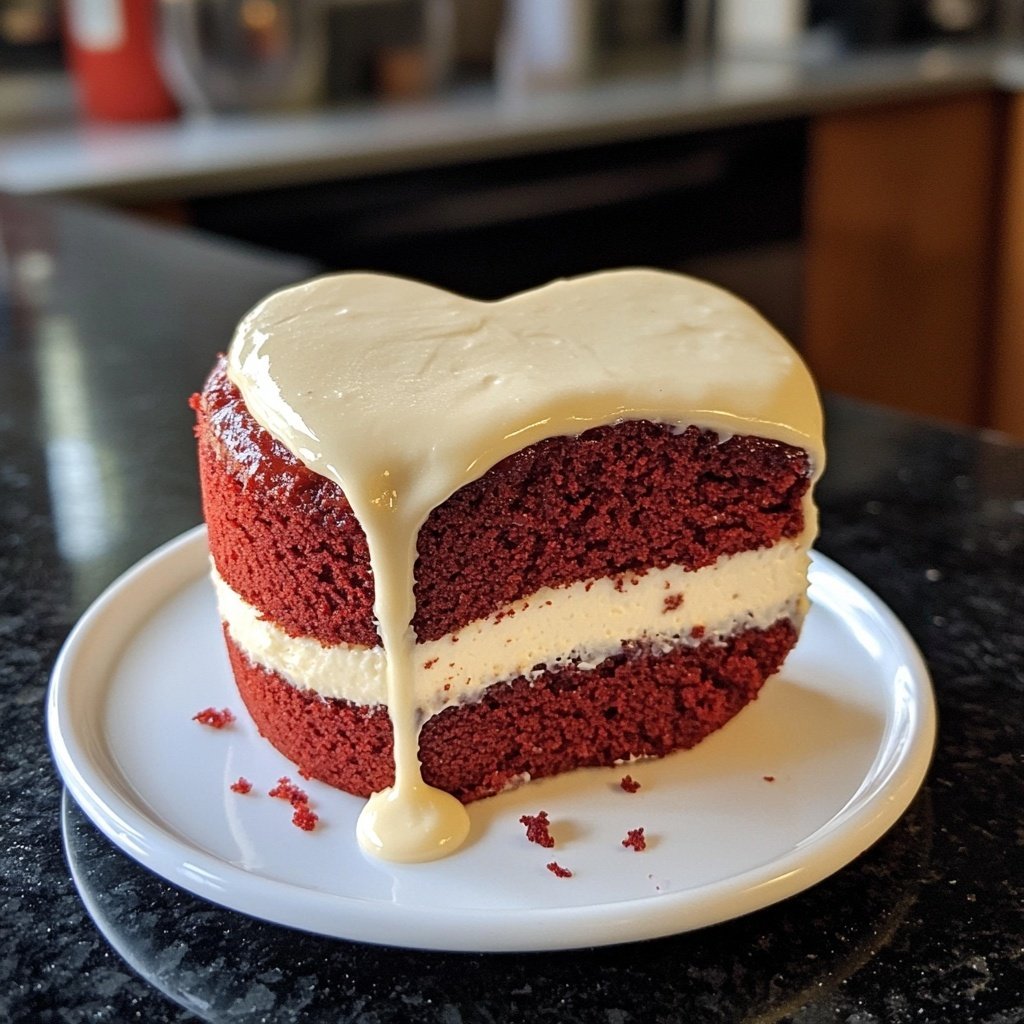
Mini Heart Cake with Red Velvet
Highlighted under: Baked Indulgences
I absolutely love making these Mini Heart Cakes with Red Velvet for special occasions! The rich, velvety texture combined with the sweet cream cheese frosting just makes my heart sing. Each tiny cake is not only adorable but also packed with flavor that delights both the eyes and the palate. I find that these mini cakes are perfect for sharing or even as a personal treat. Whether it’s for Valentine's Day, anniversaries, or just because, they bring an irresistible charm and deliciousness to any gathering.
When I first decided to make these Mini Heart Cakes, I wanted to create something that would evoke joy and warmth. Testing different recipes led me to the perfect balance of cocoa and buttermilk, which gives the cakes their iconic red hue and moist texture. I also experimented with different frosting ratios until I settled on a creamy blend that complements the cake without overwhelming it.
One key tip I learned is to let the cakes cool completely before applying the frosting; this ensures that the frosting doesn't melt away and maintains that luscious finish. I’ve found that these mini cakes are not only delightful to eat but also make for stunning centerpieces that are sure to impress your guests.
Why You'll Love This Recipe
- Rich red velvet flavor with a hint of cocoa
- Cute heart shape makes them perfect for gifting
- Cream cheese frosting that perfectly complements the cake
- Ideal portion size for satisfying your sweet tooth
Baking Tips for Perfect Mini Heart Cakes
To achieve a tender and moist texture, make sure your ingredients are at room temperature, particularly the eggs and buttermilk. This allows for better emulsion and a more homogenous batter. You can also prepare your buttermilk by mixing milk with lemon juice or vinegar and letting it sit for about 5-10 minutes. This quick substitute works perfectly in recipes like this, contributing to the cake's rich flavor and moisture.
Be mindful of your mixing technique; once the wet ingredients are added to the dry, mix just until combined. Overmixing can lead to a dense cake. You want to see some small lumps in your batter. This gives your cakes the characterized light and airy texture that's signature to red velvet cakes. If you're ever in doubt, a gentle fold is your friend!
Frosting Mastery
For the cream cheese frosting, ensure your cream cheese and butter are both softened to room temperature. This makes a significant difference in texture and helps avoid lumps in your frosting. I often let them sit out for about 30 minutes before starting. If you're in a hurry, you can microwave the butter for about 10-15 seconds, but be cautious not to melt it completely.
To achieve a beautifully smooth frosting consistency, mix on medium speed until the mixture becomes glossy. If the frosting feels too thick to spread, gradually add milk, one tablespoon at a time, until you reach your desired consistency. A good frosting should be thick enough to hold its shape but manageable for spreading. Consider using a spatula for even distribution and to create decorative swirls on top.
Serving and Storing Your Mini Heart Cakes
These Mini Heart Cakes not only make a delightful dessert but also serve as an adorable gift for loved ones. You can even personalize them by adding sprinkles or small edible decorations that correspond with the occasion. For a truly special touch, consider dusting the frosted cakes with cocoa powder or edible glitter for a festive flair.
If you have any leftovers, storing your mini cakes is straightforward. Simply keep them in an airtight container in the refrigerator for up to 3-4 days. For longer storage, these cakes freeze well; just ensure they are fully cooled and wrapped in plastic wrap. You can freeze them for up to a month. When you're ready to enjoy, let them thaw in the refrigerator overnight before frosting if you haven't already.
Ingredients
Gather all your ingredients to ensure a smooth baking process.
For the Mini Heart Cakes
- 1 ½ cups all-purpose flour
- 1 cup granulated sugar
- 1 teaspoon baking powder
- ½ teaspoon baking soda
- ½ teaspoon salt
- ⅓ cup unsweetened cocoa powder
- 1 cup vegetable oil
- 1 cup buttermilk, room temperature
- 2 large eggs
- 2 tablespoons red food coloring
- 1 teaspoon vanilla extract
- 1 teaspoon white vinegar
For the Cream Cheese Frosting
- 8 oz cream cheese, softened
- ½ cup unsalted butter, softened
- 4 cups powdered sugar
- 1 teaspoon vanilla extract
- 2 tablespoons milk (if needed for consistency)
With everything ready, we can now move on to the fun part – baking and decorating!
Instructions
Follow these steps to create your delightful Mini Heart Cakes.
Prepare the Oven and Pans
Preheat your oven to 350°F (175°C) and grease the mini heart-shaped cake pans with butter or cooking spray.
Mix Dry Ingredients
In a large bowl, whisk together the flour, sugar, baking powder, baking soda, salt, and cocoa powder until well combined.
Combine Wet Ingredients
In another bowl, mix the vegetable oil, buttermilk, eggs, food coloring, vanilla extract, and vinegar until smooth.
Combine Mixtures
Pour the wet ingredients into the dry ingredients and mix until just combined. Be careful not to overmix.
Pour into Pans
Divide the batter evenly among the prepared mini heart pans, filling each about two-thirds full.
Bake
Bake in the preheated oven for 20 minutes, or until a toothpick inserted into the center comes out clean.
Cool
Let the cakes cool in the pans for 10 minutes before transferring them to a wire rack to cool completely.
Make the Frosting
In a bowl, beat the softened cream cheese and butter until smooth. Gradually add the powdered sugar and vanilla extract, mixing until well combined. If the frosting is too thick, add milk a little at a time until desired consistency is reached.
Frost the Cakes
Once the cakes are completely cooled, frost the tops of each mini heart cake generously with the cream cheese frosting.
Serve
Decorate as desired and serve these delightful treats at your next celebration!
Enjoy each bite of these charming mini cakes!
Pro Tips
- For an extra touch, sprinkle some cocoa powder or edible glitter on top of the frosted cakes before serving.
Key Ingredients Explained
The use of red food coloring is essential in this recipe, elevating the visual appeal of the red velvet cake. The right amount not only gives the cake its signature color but also enhances the overall flavor by balancing the richness of the cocoa powder. If you're looking for a natural alternative, beet juice can work as a substitute, though it might slightly alter the flavor and hue.
Buttermilk plays a crucial role in providing moisture and a slight tang to the cake, complementing the sweetness and cocoa. If you're without buttermilk, you can create a quick substitute using milk mixed with vinegar or lemon juice. This combination adds acidity, which activates baking soda for a lighter cake.
Customization and Variations
Feel free to get creative with your Mini Heart Cakes by infusing them with different flavors. For instance, adding espresso powder can enhance the chocolate notes in the cake. Alternatively, incorporating lemon zest into the cream cheese frosting can create a delicious citrus twist that cuts through the richness of the frosting, making it even more refreshing.
If you're catering to different dietary needs, this recipe can be modified. Use gluten-free flour as a one-to-one substitute for the all-purpose flour and dairy-free cream cheese for a lactose-free option. Both versions maintain the delightful flavor and integrity of the original recipe, allowing everyone to indulge in these adorable cakes.
Questions About Recipes
→ Can I use regular food coloring instead of gel?
Yes, but gel food coloring gives a more vibrant color without adding too much liquid.
→ How do I store leftover cakes?
Store in an airtight container in the refrigerator for up to 3 days. Bring to room temperature before serving.
→ Can I freeze the mini cakes?
Absolutely! Freeze the unfrosted cakes for up to 2 months. Thaw in the fridge before frosting.
→ What can I use instead of buttermilk?
You can make a substitute by mixing 1 cup of milk with 1 tablespoon of vinegar or lemon juice and letting it sit for 5 minutes.
Mini Heart Cake with Red Velvet
Created by: Brittany Shaw
Recipe Type: Baked Indulgences
Skill Level: Intermediate
Final Quantity: 6 cakes
What You'll Need
For the Mini Heart Cakes
- 1 ½ cups all-purpose flour
- 1 cup granulated sugar
- 1 teaspoon baking powder
- ½ teaspoon baking soda
- ½ teaspoon salt
- ⅓ cup unsweetened cocoa powder
- 1 cup vegetable oil
- 1 cup buttermilk, room temperature
- 2 large eggs
- 2 tablespoons red food coloring
- 1 teaspoon vanilla extract
- 1 teaspoon white vinegar
For the Cream Cheese Frosting
- 8 oz cream cheese, softened
- ½ cup unsalted butter, softened
- 4 cups powdered sugar
- 1 teaspoon vanilla extract
- 2 tablespoons milk (if needed for consistency)
How-To Steps
Preheat your oven to 350°F (175°C) and grease the mini heart-shaped cake pans with butter or cooking spray.
In a large bowl, whisk together the flour, sugar, baking powder, baking soda, salt, and cocoa powder until well combined.
In another bowl, mix the vegetable oil, buttermilk, eggs, food coloring, vanilla extract, and vinegar until smooth.
Pour the wet ingredients into the dry ingredients and mix until just combined. Be careful not to overmix.
Divide the batter evenly among the prepared mini heart pans, filling each about two-thirds full.
Bake in the preheated oven for 20 minutes, or until a toothpick inserted into the center comes out clean.
Let the cakes cool in the pans for 10 minutes before transferring them to a wire rack to cool completely.
In a bowl, beat the softened cream cheese and butter until smooth. Gradually add the powdered sugar and vanilla extract, mixing until well combined. If the frosting is too thick, add milk a little at a time until desired consistency is reached.
Once the cakes are completely cooled, frost the tops of each mini heart cake generously with the cream cheese frosting.
Decorate as desired and serve these delightful treats at your next celebration!
Extra Tips
- For an extra touch, sprinkle some cocoa powder or edible glitter on top of the frosted cakes before serving.
Nutritional Breakdown (Per Serving)
- Calories: 380 kcal
- Total Fat: 26g
- Saturated Fat: 15g
- Cholesterol: 195mg
- Sodium: 85mg
- Total Carbohydrates: 32g
- Dietary Fiber: 3g
- Sugars: 24g
- Protein: 6g